Recently in Fluorescent Category

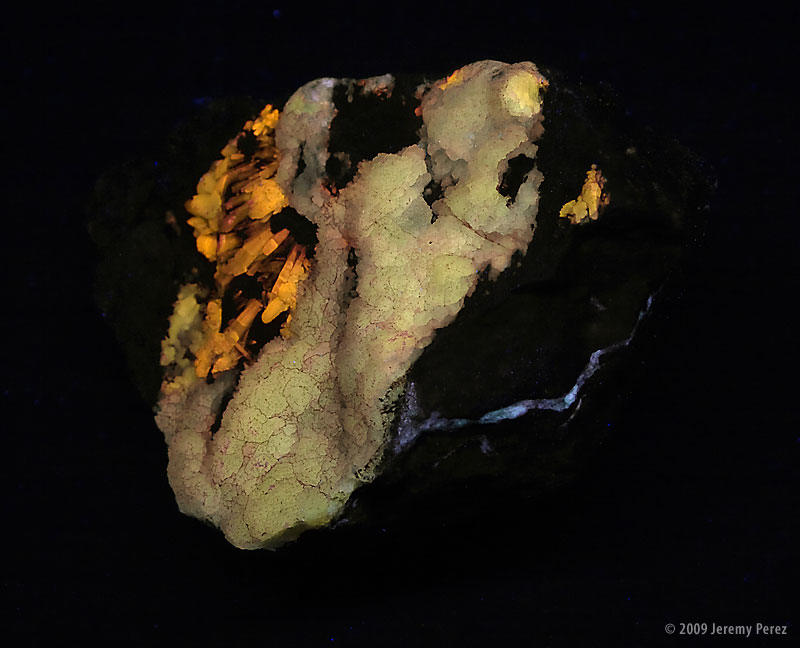
Next month, we'll be doing some rock hounding in Iron County, Utah. When we were there last year, we spent just a couple hours at some mine dumps west of Cedar City and found some great specimens...several of these turned out to be fluorescent under a standard black light (long wave UV). Since I really want to track down some more of these awesome rocks, I ordered a couple portable UV lamps to bring with us. The first one arrived a few days ago--a 4 watt short wave UV lamp. I hadn't seen any of our collection under short wave UV yet, so I got busy shining it on everything we had. I was excited to see that this lamp nearly doubled the number of fluorescents we have--and some of them are stunning!

A four watt lamp is very low power, but it's enough to examine things (and was all I could afford for the time being). I won't be able to stalk around after dark and shine it on a massive hill of mine tailings and see anything, but it works well enough that I should be able to throw a black tarp over myself and get in close to see if anything lights up.

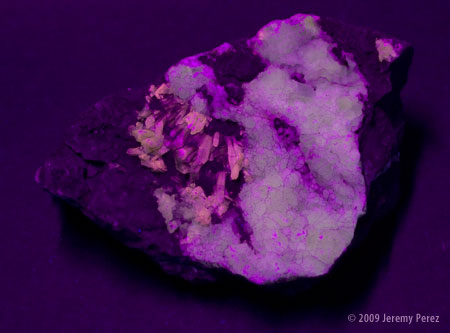
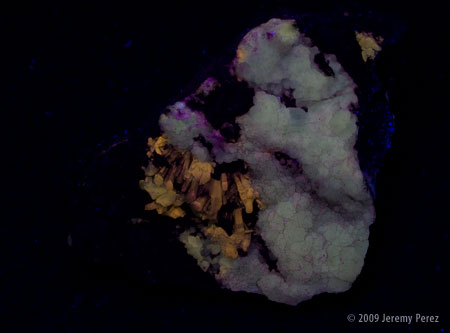
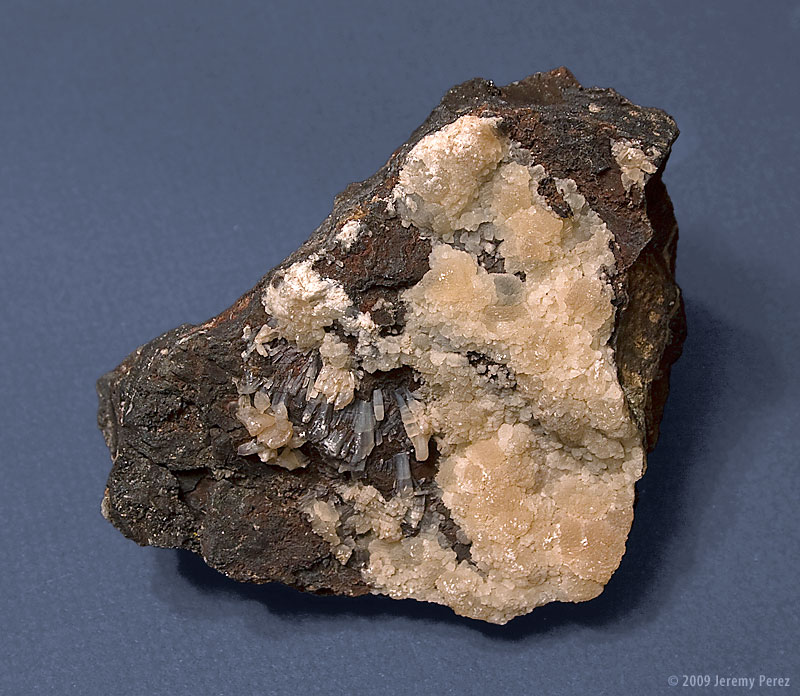
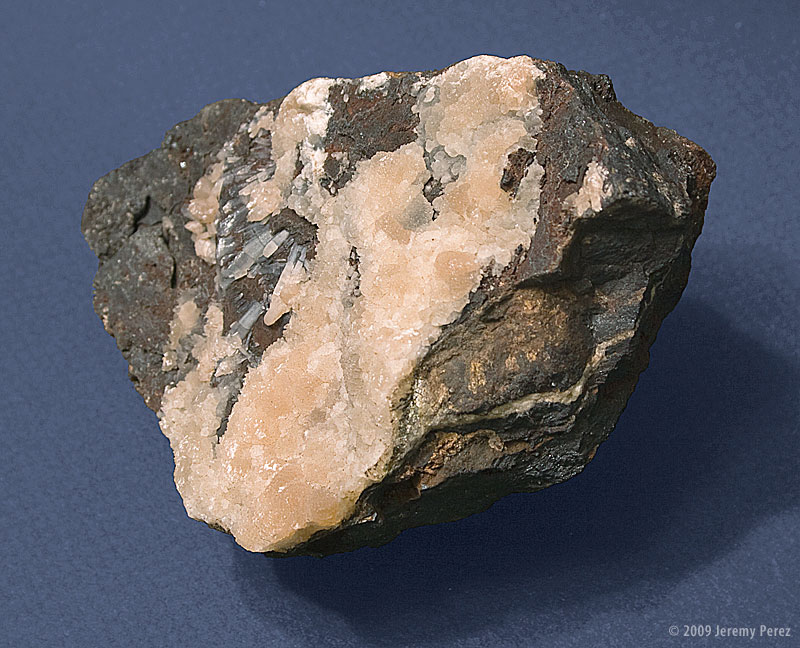
Here are the photos of our current fluorescent collection. It contains rocks from the Comstock Mine Dump, Iron County, UT; Chalcedony from Brian Head, UT; Rocks from north of La Madera, NM; Petrified Wood from Hurricane Mesa, UT; and some small, bright red specimens from south of Cleator, AZ. Click to view larger versions of the images (the larger ones are better).

Click this link to view large rollover graphic showing all 3 images aligned (550K).
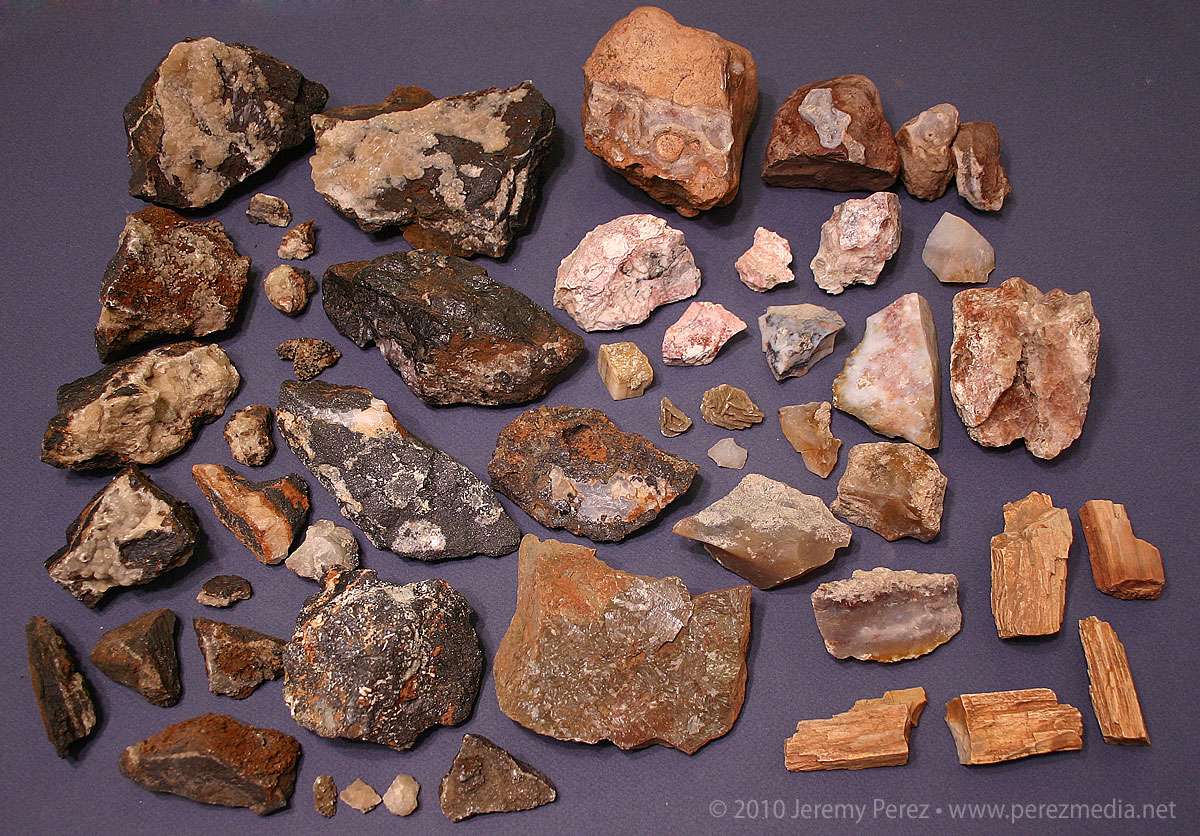

White Light

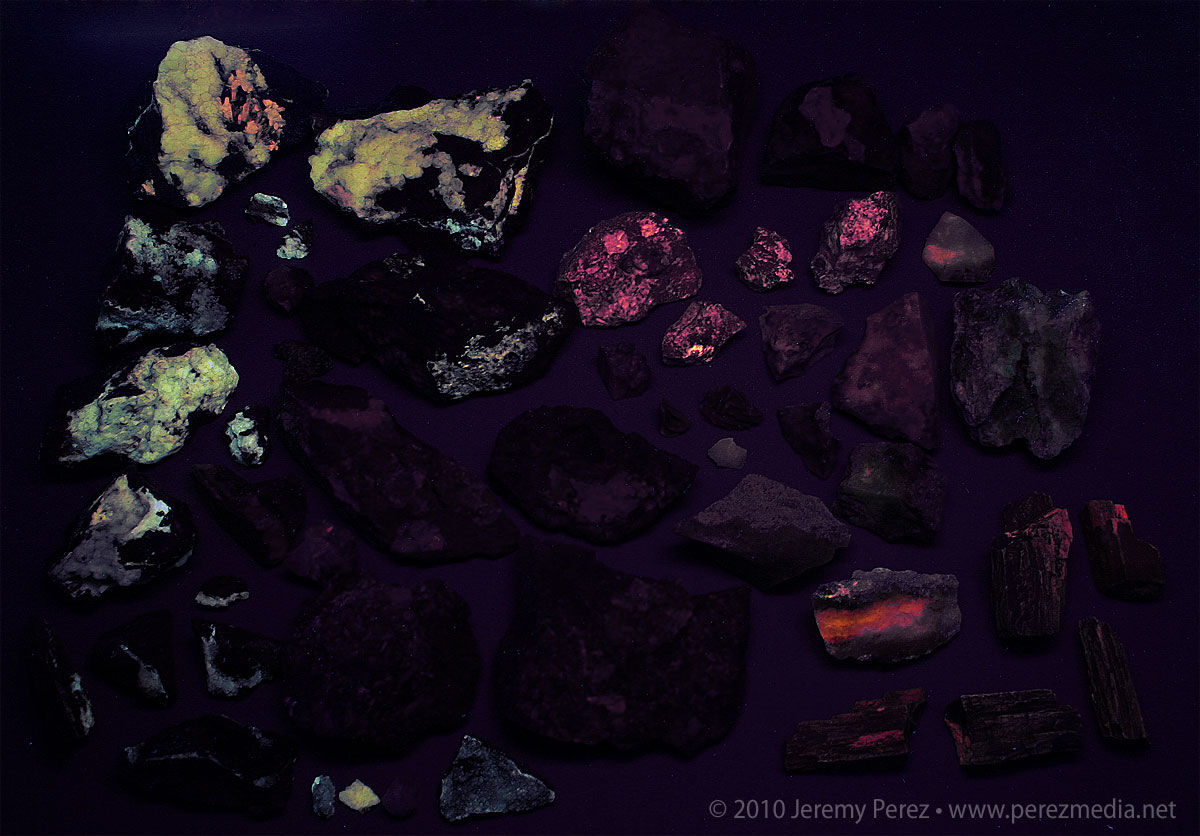
Long Wave Ultraviolet

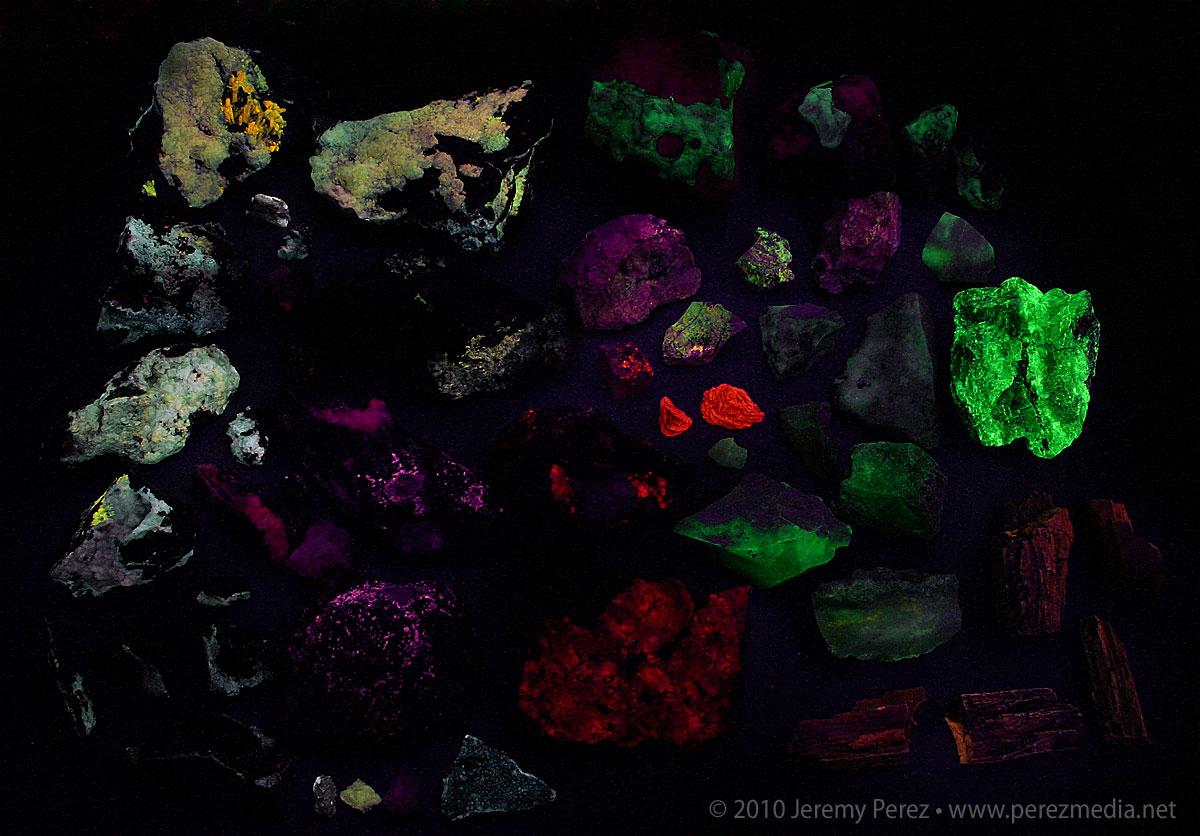
Short Wave Ultraviolet

UV Photography Lessons

My first attempt at photographing fluorescent minerals was pretty rough. Although the rocks looked great visually, the camera was less than pleased with the situation. I'm currently using a simple black light to do this, and I quickly realized that the huge amount of visible light produced by these lamps tends to swamp the camera's CCD/CMOS. It really overwhelmed the actual fluorescing colors in my first batch, and I had to do a lot of heavy overall correction in Camera RAW and LAB color space.

After doing some more research, I realized that this is just what professional grade UV lights are made to overcome. They are filtered to emit very little visible light, so that everything you do see and photograph is the result of genuine fluorescence. Because I'm not ready to invest in that kind of set up, I decided to piece together a more affordable system and see how I like it. I purchased a Long Wave UV Filter from UV Systems and paired it with a Phillips black light bulb from Home Depot. By positioning the filter above the rock, then resting the black light over the filter, I got an immediate improvement. Visually the difference was apparent, although not really spectacular. However, the photographs benefited immensely. Notice the comparison below.

The first image is from my original set of photographs using a GE black light bulb and no filter. The second image is from my latest set of photos using the Phillips black light bulb and the Long Wave UV Fillter. These are original, unprocessed images, opened using the default Camera RAW settings, with only scaling, cropping and labeling applied.


Original photo using GE UV bulb and no filter


Latest photo using Phillips UV bulb and Long Wave UV filter

I've replaced the images in that original post with the new photos, including a new angle of the rock to show a striking sliver of white running across one side.

I had basically given up on a piece of fluorescent chalcedony from that original photo session that glowed with a soft orange. The purple overwhelmed it and I couldn't get rid of it without eliminating the fluorescent orange too. Using the new bulb and filter I got excellent results with it last week. So I'll eventually get that one posted here too.


White Light View
Click image for larger version.


Long Wave UV View
Click image for larger version.

Amanda collected this little chunk of crystal-infused magnetite. It featured two different types of crystaline structures. The best part though was seeing it under a black light. The two different crystal types fluoresced with different colors: yellow and orange. Additionally, some less prominent material exhibited a white fluorescence. It should be interesting working on identifications for this one.

The LW Ultraviolet images can be seen below each of the white light views. Visible in the second set of images is a beautiful, thin vein of the white-fluorescing material along a less exposed edge of the stone. This was my second attempt at black light photography. It turns out to be pretty tricky. My first set of image exposed a huge amount of visible purple from the light that didn't seem as prominent visually. A lot of heavy color balance gymnastics in the camera RAW conversion process brought it back to something that was workable. Further work in the LAB color space while looking at the rock under black light was also required to take it the rest of the way.

After doing some more research, I picked up a Long Wave UV Filter from UV Systems. I also picked up an 18" black light bulb manufactured by Phillips since it apparently has a higher density of UV compared to visible emission. Placing the LW UV filter across the bulb produced a noticeable reduction in visible purple and the photographs turned out much better. I didn't need to horse around with color balance in RAW or LAB. The only issue was some of the crystal faces that reflected the light directly into the camera still possessed a purple appearance, and I needed to use the selective color filter to remove that. The images you see here are a result of that 2nd set of photographs.


White Light View
Click image for larger version.


Long Wave UV View
Click image for larger version.

Mineral TypeMagnetite - Fe+2Fe+32O4
Unidentified Crystal
Size11 x 8 x 3 cm
Collection ID09062104A
Collection LocationNear Comstock Mine, Iron Springs County, Utah, USA
37:36.874 N 113:23.576 W
Collection DateJune 21, 2009