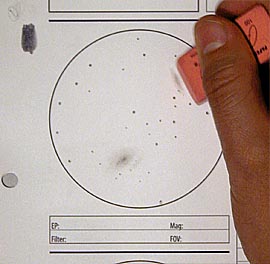
 Now comes the tidying up stage. If necessary, I'll break out an eraser and deal with any overzealous object boundaries, or to give a harder edge to an object that is too soft.
 |
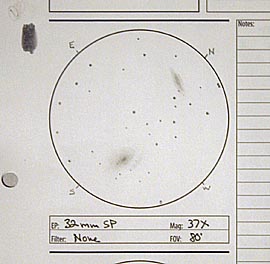 Finally, I make sure I've marked in the remaining cardinal directions, and other details I feel are important to that particular sketch, such as the eyepiece used, any filters, the magnification, and the field of view. Other more general notes are kept elsewhere on the note sheet. But the field of view is important when I make my written notes, since it helps me to describe how large an object looked or how far key elements were separated from one another.
 |
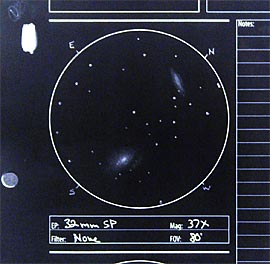 Here is the image, reversed, as I usually present them here.
 |
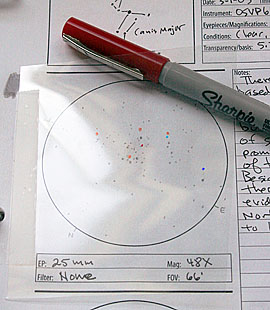 One final note. I've started trying to discern star color in my sketches whenever possible. If the star field is sparse, or there are relatively few colorful stars, I'll lightly write a letter next to the star to indicate its color (B=blue, Y=yellow, O=orange, R=red). I then erase these letters in Photoshop after scanning, and then color the stars digitally. If the star field is dense or heavy with colored stars, I tape a square I've cut from a copier transparency sheet over the sketch area. I then use some colored sharpies to mark the appropriate color over the stars. I refer to the overlay after scanning to color the stars in question. One final note. I've started trying to discern star color in my sketches whenever possible. If the star field is sparse, or there are relatively few colorful stars, I'll lightly write a letter next to the star to indicate its color (B=blue, Y=yellow, O=orange, R=red). I then erase these letters in Photoshop after scanning, and then color the stars digitally. If the star field is dense or heavy with colored stars, I tape a square I've cut from a copier transparency sheet over the sketch area. I then use some colored sharpies to mark the appropriate color over the stars. I refer to the overlay after scanning to color the stars in question. |
| Well, that's my angle. There are of course many ways to do this, and I know I'll be trying out new techniques as the opportunity arises. Links to some other excellent tutorials can be found at my Astronomical Sketching Resources Page. |
PAGE 3 OF 3
PREVIOUS PAGE
[Edit NOV 16, 2006: Updated conclusion and link to astronomical sketching resources page]


colors for stars---I also draw on white paper and invert the image. But for colors, I took a sheet of white paper and drew samples of each colored pencil I have, and wrote the number of the pencil to make it easier to match pencils with samples later. I scanned it in, copied and inverted it, and printed it back out--a page with "as-is" colors/pencil numbers and the inverted version next to it. So, when I want a color, I find it in the inverted version, and use the number and the non-inverted version to find the right pencil.