Table of Contents
- Introduction
- What you will need
- Scanner peculiarities
- To invert or not to invert
- Sizing your image
- Dealing with a color cast
- Inverting the image
- Adjusting luminosity and overall color
- Image cleanup
- Adding spot color
- A note on saving
- Further note on using a digital camera to import your sketch
- Reference info
So you've sketched a few DSOs, and you would like to scan them and post them to the web on a forum or gallery or maybe your own site. You can definitely make it as straightforward as you want--scan, crop, resize, save, post. I know there are times when that will work, but what if you are having trouble getting that hint of nebulosity to show up on the monitor? What happens if you invert the sketch so the sky is black and the stars are white? How do you deal with the variability in people's monitors? What about introducing color? I've been playing around with these issues on my own sketches since I started posting them here, and I'd like to share what I've found out so far.
- Access to a scanner. (Or a digital camera--more on that later.)
- Access to some form of image editing software, especially one that allows you adjust the tone of the image by means of a 'levels' or 'curves' tool.
- A certain level of familiarity with your software to access tools for the following tasks: Cropping, Image Resizing, Cloning (Rubber-stamp tool), Painting Tools. I use Adobe Photoshop, and software details will be based on this program. If you use another image editing program, you will need to cross-reference the Photoshop tools to their counterparts in your image program. Note that in some places I will mention that the option/alt key needs to be held down. This means hold down the option key if you use a Macintosh, or hold down the Alt key if you use a Windows PC.
A couple free image enhancement programs for Microsoft Windows are:
PixInsight (As far as I can tell, PixInsight wil not let you make selections, or selectively edit to clean up or colorize parts of your images.)
Gimp (An excellent program. Available for both Windows and Mac OSX, but requires developer tools for an OSX installation.)
At the end of the tutorial, I will include some basic information about what tools in PixInsight and Gimp correspond to Photoshop. Both programs do well with global image enhancement, but Gimp is better at selective editing, cleanup and colorization. Many of its tools operate in a very similar fashion to Photoshop, and so would be easier to compare with the tips in this tutorial. I'd call Gimp a most worthy free substitute for Photoshop.
There are a few things you can do when scanning to increase the quality of your sketch images.
- Be sure that you keep your sketch pressed as flat as possible against the scanner glass. Any uneveness can result in ripples showing up in your scan when you try to bring out very faint nebulosity.
- Scan to a size and resolution that will cover all your potential uses for the scan. It is better to scan to a higher resolution and scale down later than to try the other way around. For example, I typically scan my entire record sheet to keep as an archive in case anything ever happens to the paper original. To that end, I scan the whole sheet at 300 ppi (pixels per inch) in RGB mode. I then save the page as a "Very High" quality JPG which often ends up as a 2-3 Mb file. I extract my sketches from that later and reduce their size and resolution individually to work for the web.
- If your scanner has an auto-calibration tool, by all means use it...unless its broken, in which case don't use it. I like to scan my images in full color, even though they are pencil sketches. I feel it adds a little bit of personality to the sketch to have some slight color variation in it to start with--even though I mess with this later. However, I try to make sure the scanner gives me the scan as close to neutral as possible. If your scanner is consistently giving you off-color images that are overly yellow, green or otherwise, it may be a good idea to just scan in Grayscale mode to begin with. You can always convert that grayscale image to RGB later for any colorization you wish to do. This will give you a perfectly neutral image to work with, which is better than trying to get rid of a bad color cast if you aren't experienced with that sort of thing.
- After you scan an image, keep an eye out for clipped highlights or shadows. Thats a way of saying to watch out that you aren't losing subtle details in the lightest lights and darkest darks. If you sketch with pencil on white paper, the highlights are going to be your potential problem area. If you sketch with white chalk or pencil on black paper, it will likely be the opposite problem. Here is an example of what you want to avoid:
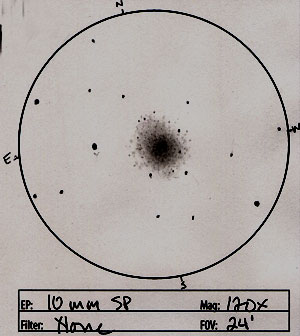
Figure 1: Image with no clipping problems (M 92)
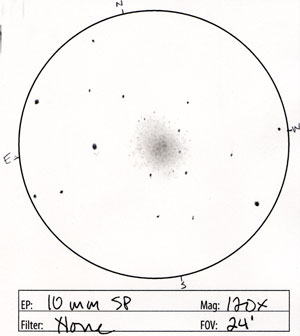
Figure 2: Image with clipped highlights
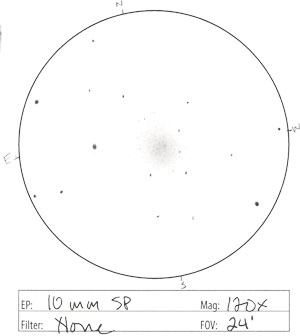
Figure 3: Image with clipped shadows
If you are having these problems, you need to adjust your scanner's gamma/brightness/contrast settings to alleviate it. Here's where I have to refer you to your trusty (hated?) scanner manual. If your scanner is fussy and you can't fix the hilights without really darkening the image, then go ahead and scan darker (as long as the shadows don't get clipped ;). This is something you can fix in an image editing program. You cannot fix clipped hilights or shadows.
- Give some consideration to what file format you want to use to save your original resource document. This is the file you will come back to later to extract and optimize your sketches for the web. There are "lossy" file formats (e.g., JPG) and there are non-lossy formats (e.g., TIF, PSD, EPS). Lossy file formats sacrifice some level of image quality to make your file sizes much smaller. JPG will give you a choice: Smaller file size = Big loss in quality or Larger (but still manageable) file size = Minimal loss of quality. Non-lossy formats will not sacrifice any image quality, but you will have larger files to deal with. Since I keep 300 dpi, letter-sized scans for all my reports, I prefer some compression. Not that CD-ROMs aren't affordable, but big files can be a pain to transfer around. And frankly, the fewer CDs I need to keep track of, the better. So I like to save in JPG format using "Very High" quality (Level 10 in Photoshop). For these type of images, I haven't noticed any quality issues that concern me in the slightest. Try out some file formats and see what you think.
PAGE 1 OF 7
-- Next Page --